Overview
This article explains the steps required to configure a Qdevice within a Proxmox cluster. Typically, a minimum of 3 Proxmox nodes is required in order to maintain quorum. However, using a Qdevice allows for a two-node cluster to operate and maintain quorum, without the need of an entire third Proxmox node.
- NOTE: This guide is intended for clustered environments with less than three Proxmox nodes, or environments with an even number of nodes where voting can result in a 50/50 situation. If your environment contains three or more Proxmox nodes, configuring a Qdevice is not required
What is Quorum?
Quorum refers to the minimum number of Proxmox nodes that must be online and communicating for the cluster to operate safely and make decisions using a voting system. A cluster requires more than half of its nodes to be online and connected to achieve quorum. This usually requires at least three nodes total, or a higher odd number of nodes.
Proxmox uses Corosync for communication between nodes in a cluster, and quorum is used to avoid split-brain scenarios, where two nodes of a cluster may try to manage the same resources independently, potentially corrupting the data.
The Qdevice Solution
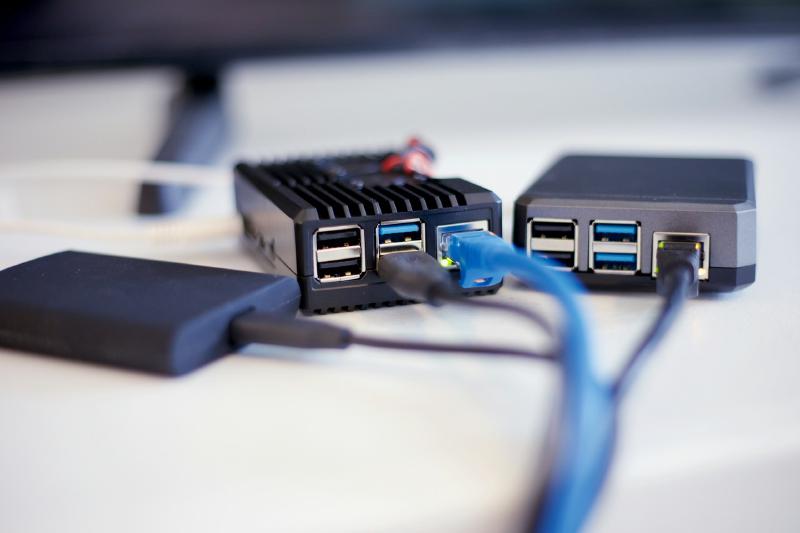
The Corosync QDevice is a service that runs on each Proxmox node, as well as on an additional device (server, raspberry pi etc), which is able to act as a “voting member” within the cluster. For this lab environment, an old Raspberry Pi will be used to provide this service. The Raspberry Pi will be connected to the LAN network where the Proxmox nodes are located.
Requirements
- An existing Proxmox cluster.
- Download the Raspberry Pi Imager Tool.
- SD Card to be used with Raspberry Pi.
- Additional Ethernet cable to connect RPi to the LAN/Management network.
- Chosen Qdevice must be running a Debian operating system.
Raspberry Pi Preparation
This section describes the steps required to configure a Raspberry Pi for use as a Qdevice to provide quorum to the Proxmox cluster. Although a Raspberry Pi is chosen for this specific task due to it’s small footprint, other options are available as replacements.
Write OS Image to SD Card
- Remove the SD card from the Raspberry Pi and insert into a computer with an available card slot. A USB Card Reader can be used for devices with no built-in SD card slot.
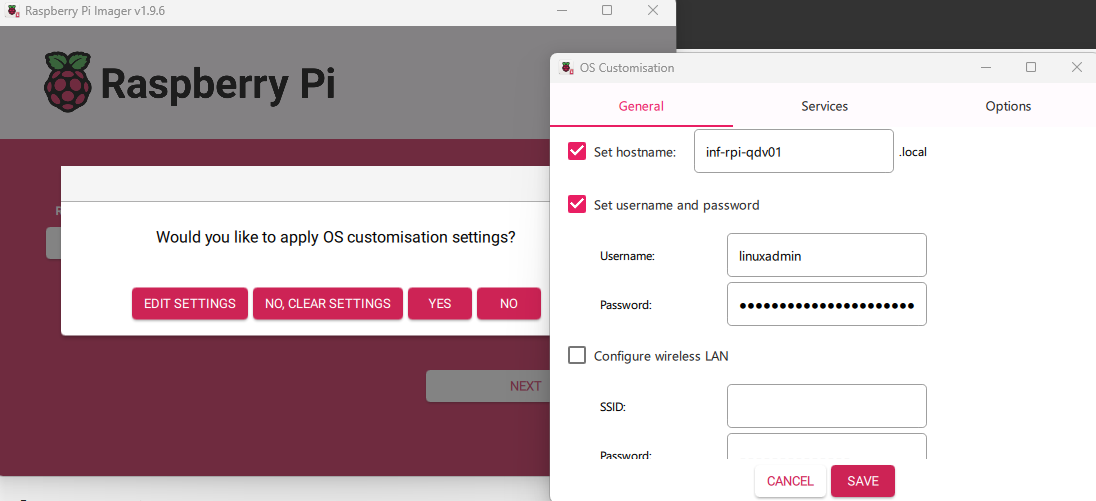
- Run the Raspberry Pi Imager application and select the desired Operating System to suit your device model. I opted for the Lite (headless) version, omitting the Desktop environment to reduce resource consumption.
- Select the SD card as the Storage method.
- An option is available to pre-configure the hostname, default credentials, WiFi network and locate settings if desired. I chose to configure these settings, including enabling SSH with password authentication under the Services tab.
- Click Next to begin writing the OS to the SD card.
Optional: DHCP & DNS Configuration (OPNsense)
NOTE: This section is only applicable when using OPNsense for firewalling, routing and DHCP/DNS services. Skip this section if not required.
With the RPi connected to the LAN and powered on, I confirmed that it has received an IP address via DHCP in OPNsense. Clicking on the plus icon under the Command column allows for setting this device to use a DHCP reservation, rather than receiving a random address from the DHCP pool.
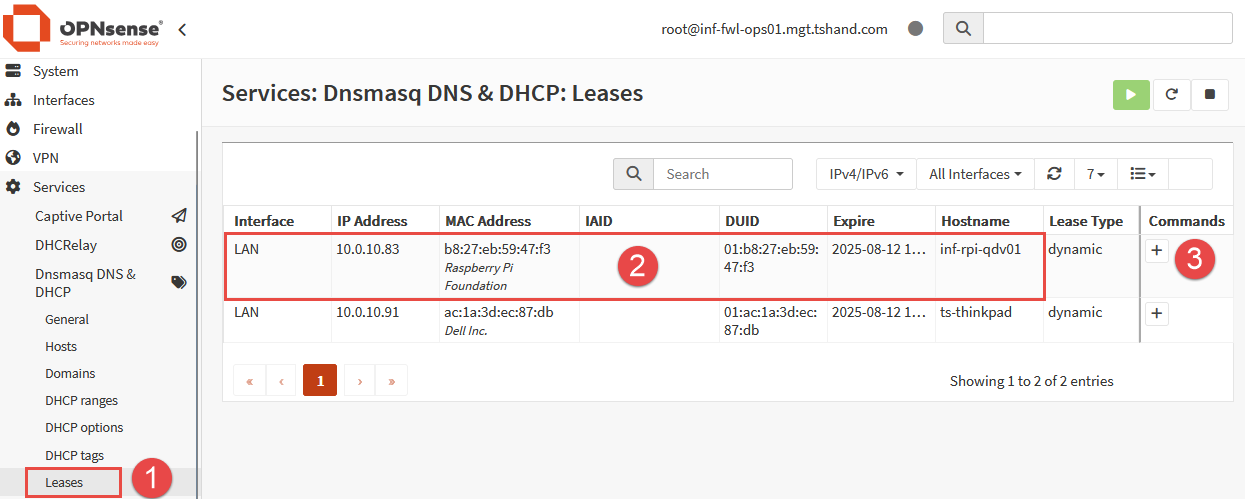

Entries for both the Qdevice and the existing Proxmox nodes can be added to DNS (Unbound) for name to IP address resolution. This will allow for us to utilize hostnames when connecting via HTTPS or SSH.

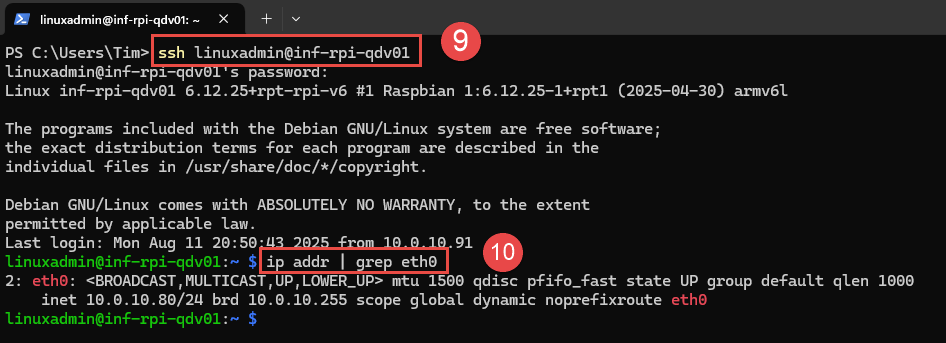
Reboot the RPi to allow it to receive the new IP address from the DHCP reservation. Once back online, confirm that SSH is available to the RPi device on the newly assigned IP address.
|
|
Qdevice Installation & Setup
Root Account SSH
A requirement for the Qdevice daemon (service) is the ability to SSH into the Qdevice (Raspberry Pi) as the root user account.
- NOTE: This is not ideal in terms of security, and not recommended in typical scenarios. However, after the initial setup of the Qdevice, firewall rules will be configured in OPNsense to block ingress and egress traffic to this device, other than from the Proxmox nodes, adding a layer of security.
- Reset the root user account password.
|
|

- SSH into the Raspberry Pi (RPi) device using the account created during the installation and SD card imaging process.
- Edit the SSH config file
/etc/ssh/sshd_configusingnanoorvitext editors.
|
|
- Locate the text
PermitRootLogonand set the value toyes.
|
|
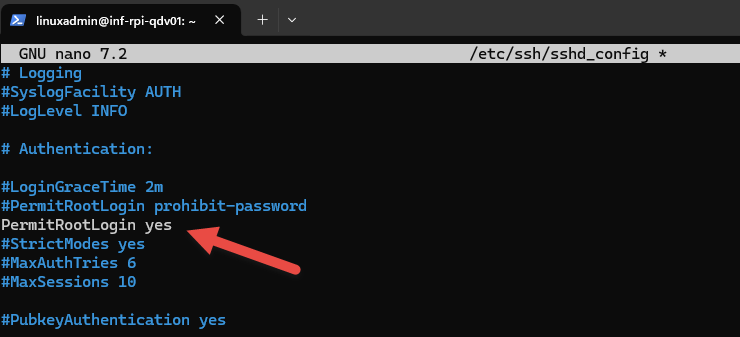
- Write the changes (
CTRL + O), then exit the nano text editor (CTRL + X). - Restart the
sshdservice.
|
|
Package Installation
Packages to be installed:
- Proxmox Nodes:
- corosync-qdevice
- Qdevice:
- corosync-qnetd
- corosync-qdevice
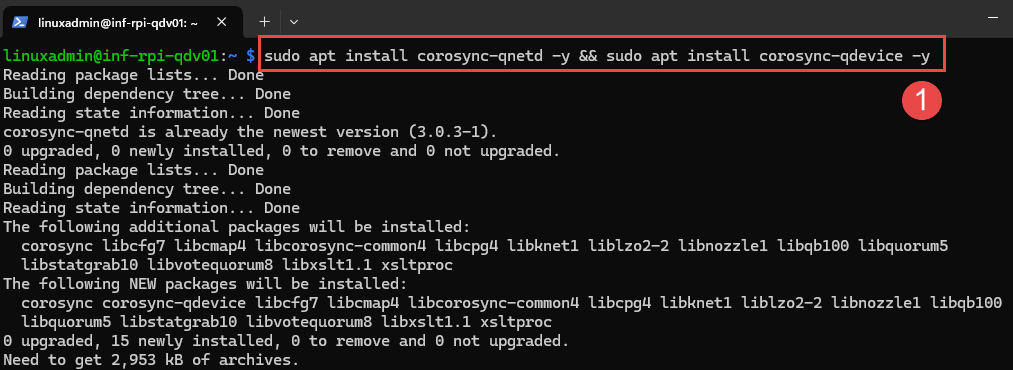
- SSH into the Raspberry Pi device update the install packages, then install the
corosync-qnetdpackage. - You may be prompted to install some other dependency packages, enter
yand pressEnter.
|
|
Proxmox Node Configuration
With the Raspberry Pi device now configured, both Proxmox nodes need to be setup to work with the Qdevice.
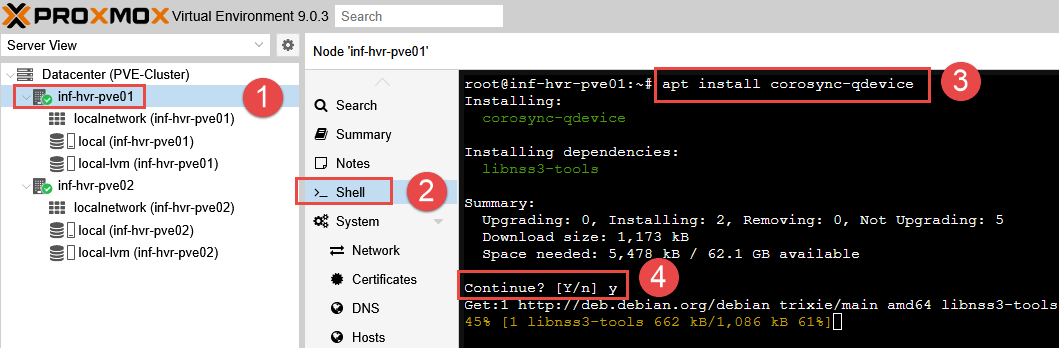
- Login to each Proxmox node (either by SSH or web interface).
- Within a shell (terminal) window, install the
corosync-qdevicepackage. - Repeat this step for both Proxmox nodes, so the package is installed on both.
|
|
- Select a Proxmox node (this step is only required on one node) and access the terminal.
- Configure the Qdevice connection by running the
pvecmcommand.
|
|
- Enter the Raspberry Pi root user account password when prompted.
- The Qdevice should now be added to the cluster as a voting member.
- Verify using command
pvecm status, noting the “QDevice” listed under Membership Information. - You should now see the entry for ‘Qdevice’ listed.
|
|
With the Qdevice now added to the cluster to provide/maintain quorum, if a Proxmox node goes down, the cluster will still be able to function with the Qdevice providing the required vote to maintain cluster quorum.
Next Steps
This concludes the steps required to configure a Qdevice used to maintain quorum for Proxmox. The next part in the series will provide the steps required to configure a ZFS storage pool in the Proxmox datacenter, useful when the option for shared storage is not available.
Cover photo by Jainath Ponnala on Unsplash